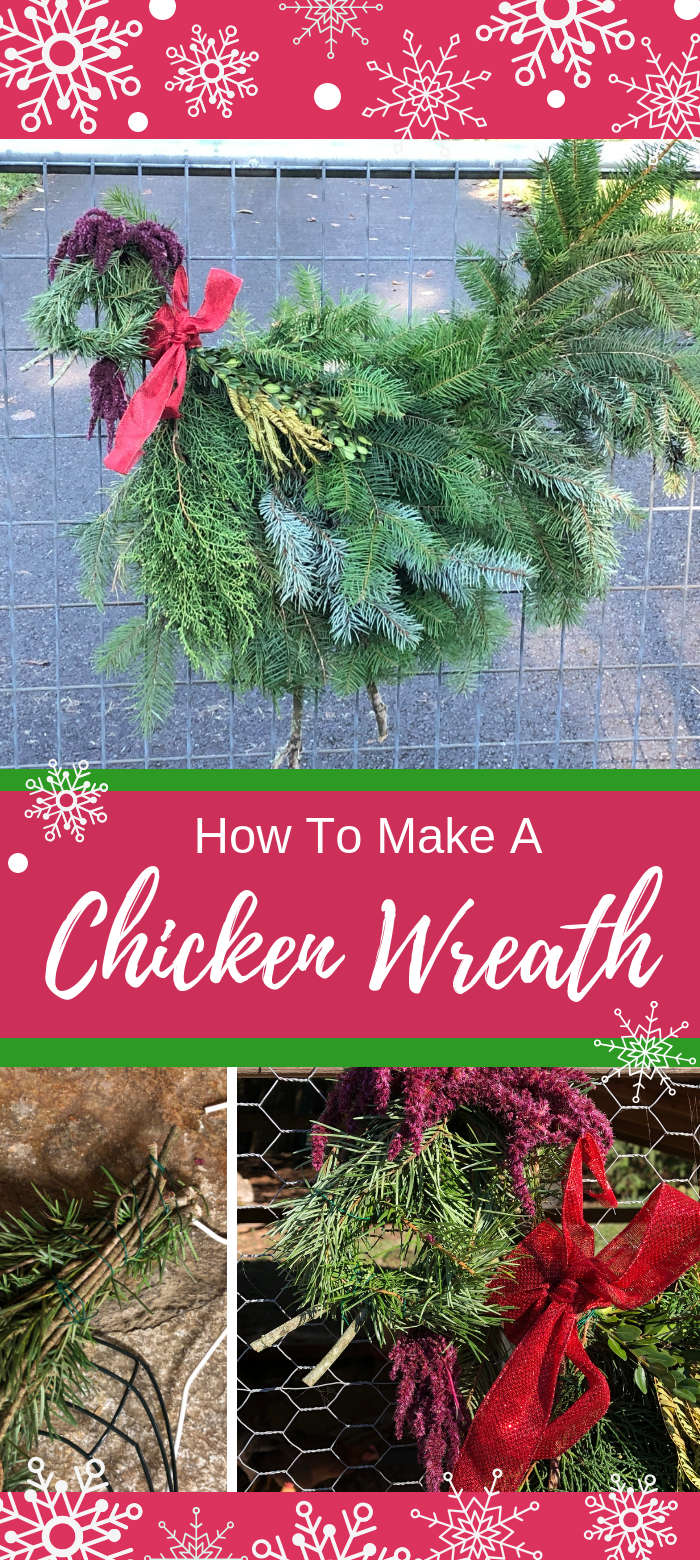
I’ve wanted to make a chicken wreath for the holidays for years and I just never got around to it! Finally, this year, I made it happen. And you know what? It was super easy, barely took any time at all and was nearly free. How can you go wrong with that? I’ll show you how I made my chicken wreaths (a hen and a rooster) and you’ll see just how easy it is.
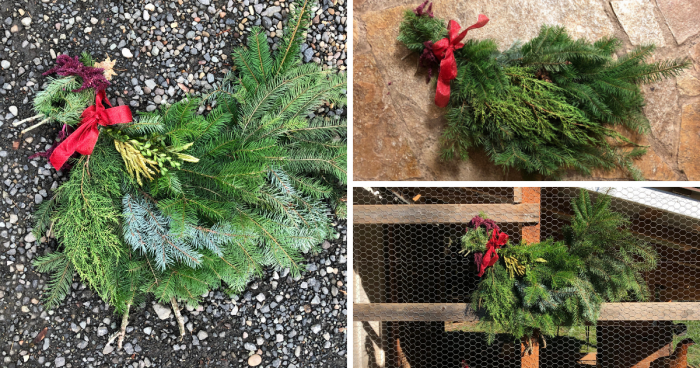
Step By Step: How to Make a Chicken Wreath
Step One:
Collect your supplies.
You’ll need various branches and greenery. I happen to live on a farm with lots of trees, so I just walked around the property and took a bit of the different kinds of evergreen trees (HINT: Take more than you think you’ll need). Keep an eye out for twigs/sticks that you can use for legs and beaks.
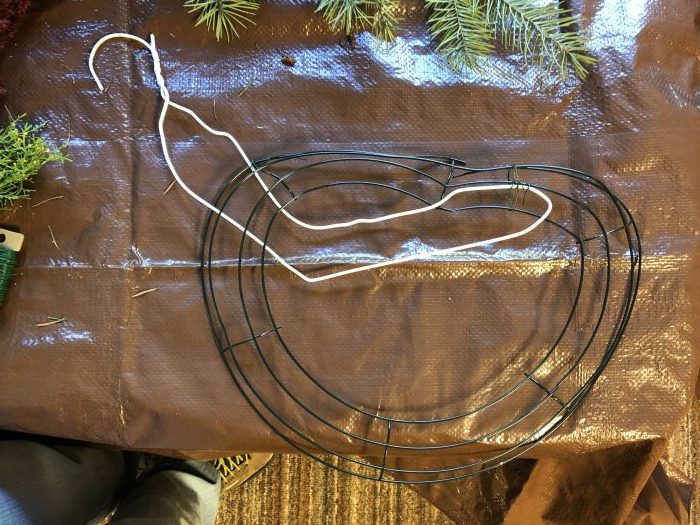
For these chicken wreaths, I used both a wire coat hanger (which I got from neighbor) and a wire ring used for wreath making (which I got at the dollar store for $1)
You’ll also need a small gauge wire that comes on a paddle (which you can pick up in the floral department of any craft store). It runs around $2. (Like this)–affiliate link.
Ribbon. This time of year there’s a ton of ribbon everywhere and it’s mostly all on sale.
Something to snip/cut branches with.
Wire cutters (I forgot to bring my along so I used my hedge trimmers! It worked, but it was kinda clumsy).
Anything else you’d like to add. I threw in some Box Elder leaves, and I used the Amaranth growing in the ‘chicken garden’ as a comb and waddle. I’m not sure how that will hold up. But I do have some back up ‘fake’ greenery (with red berries) that I picked up at the dollar store for a back up.
Depending on where you’re making this, a tarp or some kind of drop cloth might come in hand, but isn’t necessary (especially if you make them outside or in a barn or garage or something).
Step Two:
Assemble your chicken wreath.
Once all your supplies are collected, it’s time to create chickens!
To get started, mangle all wire things. I took the wire wreath form and smashed it flat on the top because I didn’t want a round chicken. The coat hanger is mostly for neck and head support, so stretch and twist it up to make it work. Mostly, I just wanted the coat hanger (you could use any kind of heavier wire for this) to support a neck and head of my chicken. So, just mangle away until you get it kinda like how you want it. Don’t spend too much time fussing at this point, your greenery will cover it all up (look at mine! And it still worked!)
Once you get it basically how you want it, use your small gauge wire to tie it all together in a couple of spots.
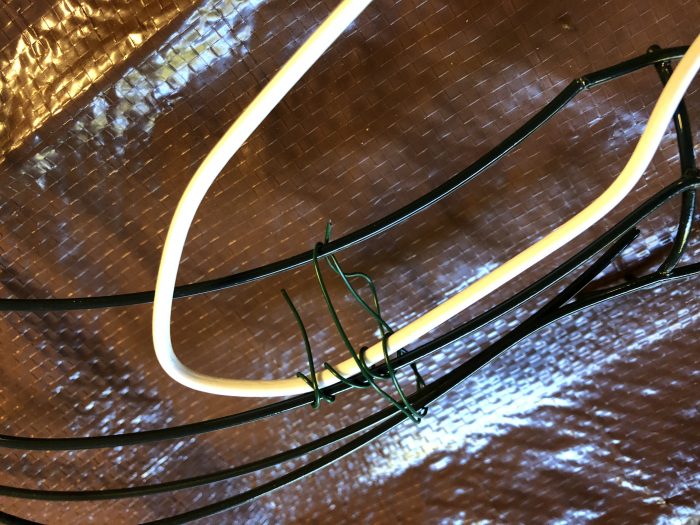
Next you’ll want to gather up a few branches and wire them together with the small gauge wire. I just wired the tops together. And then I wired them to the frame. Keep doing this until you’ve got your frame covered up.
I started with the rooster tail. I used longer branches for the rooster tail, making it stick out and up higher.
If something doesn’t look right at this point, don’t stress too much. You can always add more greenery and/or trim your greenery down to the shape you want it.

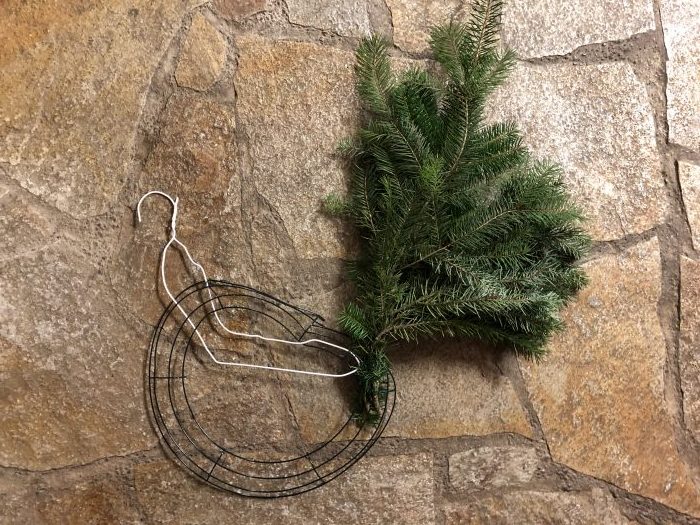
Above is the rooster in progress, below is the hen. Notice that I’m not using any variety at this point. I just want the wire frame covered and in a semi-chicken shape. I will save the variety and special touches for the top so that they don’t get buried in the other greenery.
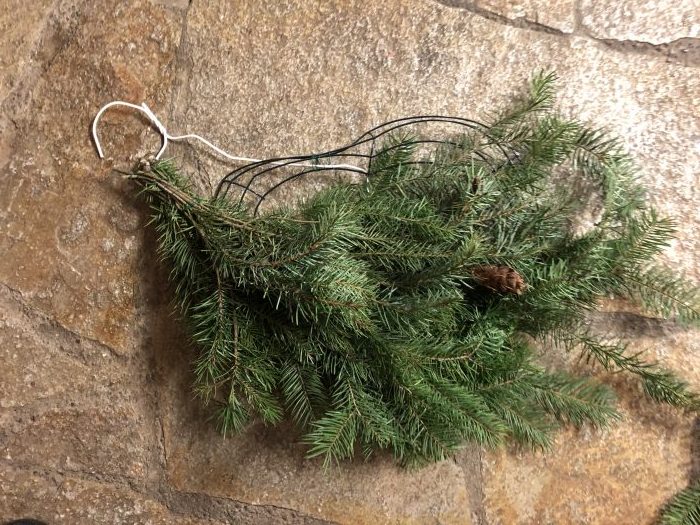
Once I had the body covered, I moved to the head. I had a hard time trying to decide how to make the head. In the end, I took greenery and wrapped it up kind of like a donut–a circle with a hole in the middle. I use the small gauge wire to hold the circle in place and then I wired it to the frame. I decide to leave the big hole as the eye. But you might have a better idea.
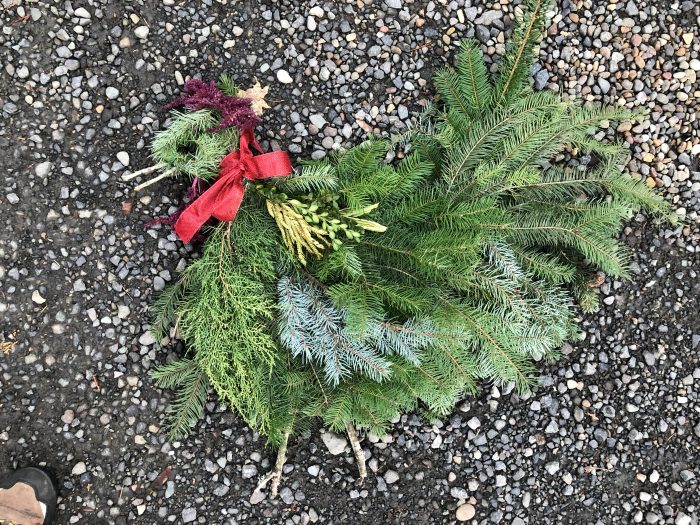
As you can see below, I lost the ‘hole’ for awhile. I ended up snipping and poking to get it back. Then I added my waddle comb as well as any of the other ‘fancy’ greens I wanted for ‘feathers’. You can see the hackle feathers below with the Box Elder (I think that’s what they are?) greens below the rooster’s neck.
I also added a different kind of greenery for the wings, so they’d stand out a little. And then added a beak and feet.
Once I got it all together, I went back and wrapped some wire around different parts of the body to make sure the greenery would stay on (remember, at this point, I’d just wrapped groups of greenery together by their tops).
Add a bow and you’re done!




Step Three:
Hang chicken wreath up!
I had a hard time deciding between the chicken coop and the gate. In the end, since I had both a hen and a rooster, I picked the gate (because I have two gates). I think it would be fun to add some twinkle lights to these, but I’m not sure I’ll find the time.
If you make a wreath, please share photos of them over at my City Girl Farming Facebook Group or on Instagram. I’d love to see what you came up with!
