Grilled pizza is a great way to make pizza in the summer when you don’t want to heat up your house. I’ve made it two different ways (cooking it on a pre-heated baking stone placed on your grill, or grilling it directly on the grill). I prefer the direct grill approach for pizza making because it’s quick and easy and everyone can make their own individual sized pizzas.

First, I use the basic dough recipe out of Artisan Bread in Five Minutes a Day (link to the book, but recipe below). Forget about the whole idea you have in your head about bread making. This isn’t it. No kneading. No punching down. None of that stuff. Just four ingredients.
Pizza Dough
3 cups lukewarm water
2 tablespoons yeast
2 tablespoons salt
6.5 cups of flour (I often substitute some of that unbleached flour for whole wheat).
Dump it all together, stir, and let set on counter for at least 2 hours (or up to 5). Cover it loosely during this time.
Presto. Dough is done. Seriously.
From here, you can refrigerate it (which, for pizza making I suggest, as it will be easier to handle) or use it at room temperature. I like to make my dough the night before so it’s had some time to sit in the fridge, but if you’re short on time, throw it in for an hour or two and that will help some. (If refrigerating, keep cover loose for first 24 hours.)
(If you want more detailed directions for this dough–which might seem more complicated at the beginning, but which you will soon know by heart if you make it very often–here’s a link.)
Pre-Grilling Prep
While your dough is chilling, grill/fry/steam or otherwise cook any of the veggies (and raw meat) you want to use on your pizza. The grilling process of pizza-making doesn’t require enough time to cook your raw meat and vegetables completely, so they need to be cooked beforehand.
Homemade Sauce
Also, if you’re making your own sauce, now is the time for this. I sometimes like to use Thai Peanut Sauce for a change of pace. But here’s a great recipe that I often use for a traditional pizza sauce (it’s from The Complete Book of Pizza):
¼ cup olive oil
2 cups chopped onion
5 cups (2 cans) Italian plum tomatoes, drained
1 teaspoon dried basil
1 teaspoon dried tarragon
2 teaspoons dried oregano
2 teaspoons salt
1 tablespoon brown sugar
6 oz (small can) tomato paste
pepper to taste
Heat oil in pan, cook onion and garlic until transparent. Stir in other ingredients and simmer for 4 minutes. Stir occasionally and break up tomatoes. Do not boil. (If you want a smooth sauce, blend it in food processor or blender before using).
Prepping Dough
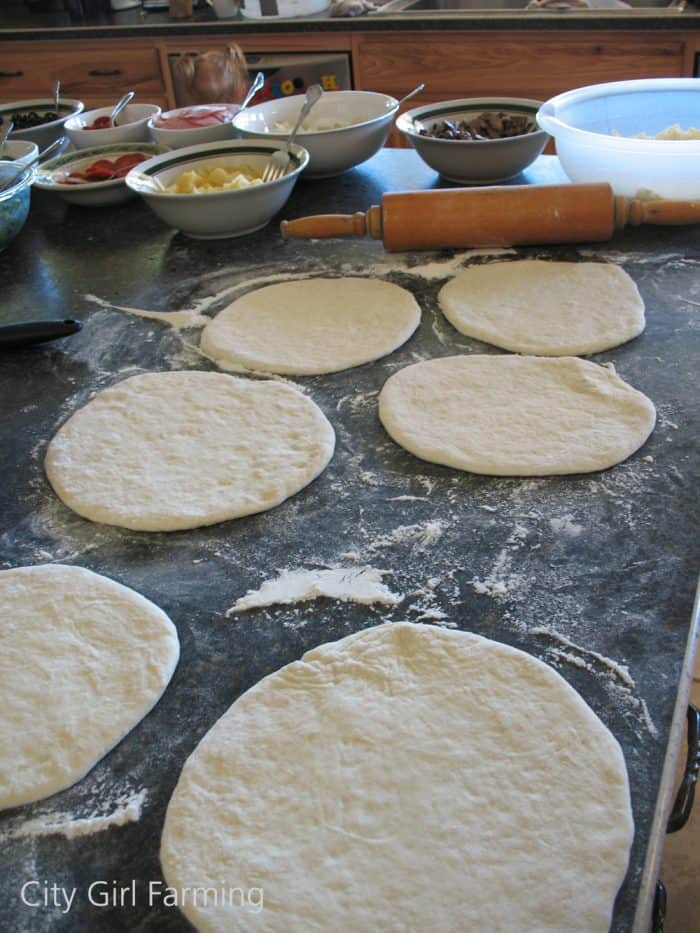
Okay, back to the dough. Grab out a chunk of dough about the size of a grapefruit. Hold that ball in your hands and stretch the surface of the dough down around to the bottom. Do this on all sides, rotating as you go. No need to knead.
Roll the ball out on a lightly floured surface to desired thickness and size. Allow to rest for 40 minutes before using.

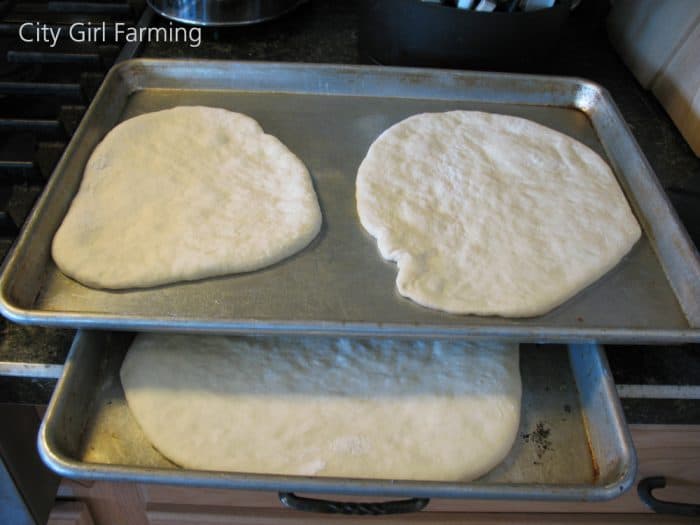
(Tip here: after rolling out, transfer to a cookie sheet/pizza sheet that’s been sprinkled with cornmeal. This will make it easier to transfer to grill—I couldn’t do that on most of my pizzas because I was cooking for a crowd the day I took these photos and ran out of cookie sheets early on in the process–this is why my pizzas are so weirdly shaped.)
Roll out as many dough balls as you want pizzas. If you don’t use all the dough, stick it back in the fridge and use it sometime within the next two weeks.

Fire Up the Grill
While the dough is resting, heat the grill. I like to cook pizza dough on a medium to medium high heat, but adjust to whatever works for you.
When everything is ready, transfer dough to the grill via cookie sheets (or pizza peels or something easy to slide dough off from). I either spray the dough or the grill with non-stick cooking spray (if using it on the grill, use the grill safe kind). Transfer the dough to the grill, close the lid and allow to cook for several minutes.
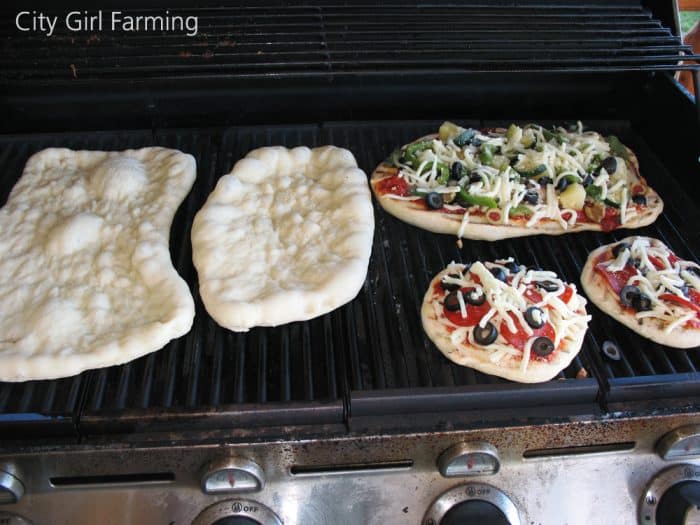
(Now, here you’ll just have to wing it a bit. The LOOK we’re going for is a cooked bottom side—don’t worry about the top at this point. Once the dough on the bottom is browned and looks done, pull it off the grill.)
When pulling the cooked pizza dough off the grill, flip it back onto a cookie sheet, uncooked side DOWN—this way the browned, cooked side is face up. This cooked side is the one you’ll add toppings to.
Add all your sauce, toppings and cheese, and carefully place back on the grill, to allow the uncooked underside to brown and cook. Keep the lid down to allow the heat to melt the cheese.
Once the underside is cooked, remove from the grill and enjoy. Cooking pizza on a grill gives the crust a slightly smoky taste, which is pretty tasty, I have to say. Yum. I’m getting hungry for more grilled pizza just talking about it!

This is a great way to keep the entire family happy as everyone can make their own pizza, just the way they like it. It’s also a great way to enjoy pizza in the summer without heating up the whole house to do it.
Enjoy!
