 If you’re like me, you might be saying, “Eeeew” right about now. To be honest, until last year sometime, the idea of eating lard totally grossed me out, so I can relate. And never, in a million years, would I have ever thought to make some lard myself. (I only use it to make tamales which I make every other year or so my life was quite happily lard free.)
But when I read something about ‘good lard’ (ie homemade), actually being GOOD for you, and ‘bad lard’ (that white brick you can buy on the grocery store shelf) being rather quite bad for you, I decided I needed to investigate this issue further.
Turns out that pigs that have been raised right (no hormones, fed the kind of food pigs should eat, etc) produce lard that has a bunch of healthy, essential fats. Much like avocados. (If you compare something to the beloved avocado, I’m listening!) Lard like this is a monounsaturated fat, contains no trans-fats and is a great source of vitamin D. In fact, it’s got less saturated fat and twice as much monounsaturated fat than butter (this is a good thing, in case you’re wondering).
That brick of lard you can get at the store has been hydrogenated and filled with chemicals and preservatives to give it a longer shelf life. (One way to tell the good lard from the bad is if you have to refrigerate it or not—the stuff you render yourself needs to stay in the fridge or freezer, the other stuff lasts in the cupboard for a long time.)
Once you actually find ‘good’ pig fat, you’ve conquered the most difficult part of rendering lard yourself. I special ordered mine from my local New Seasons Market. They only do business with farmers on the up and up with animal raising practices. If you don’t have some place like that around you, check farmer’s markets and ask around there to see if you can find any leads (your general local supermarket is going to carry factory farmed meats pumped full of who-knows-what).
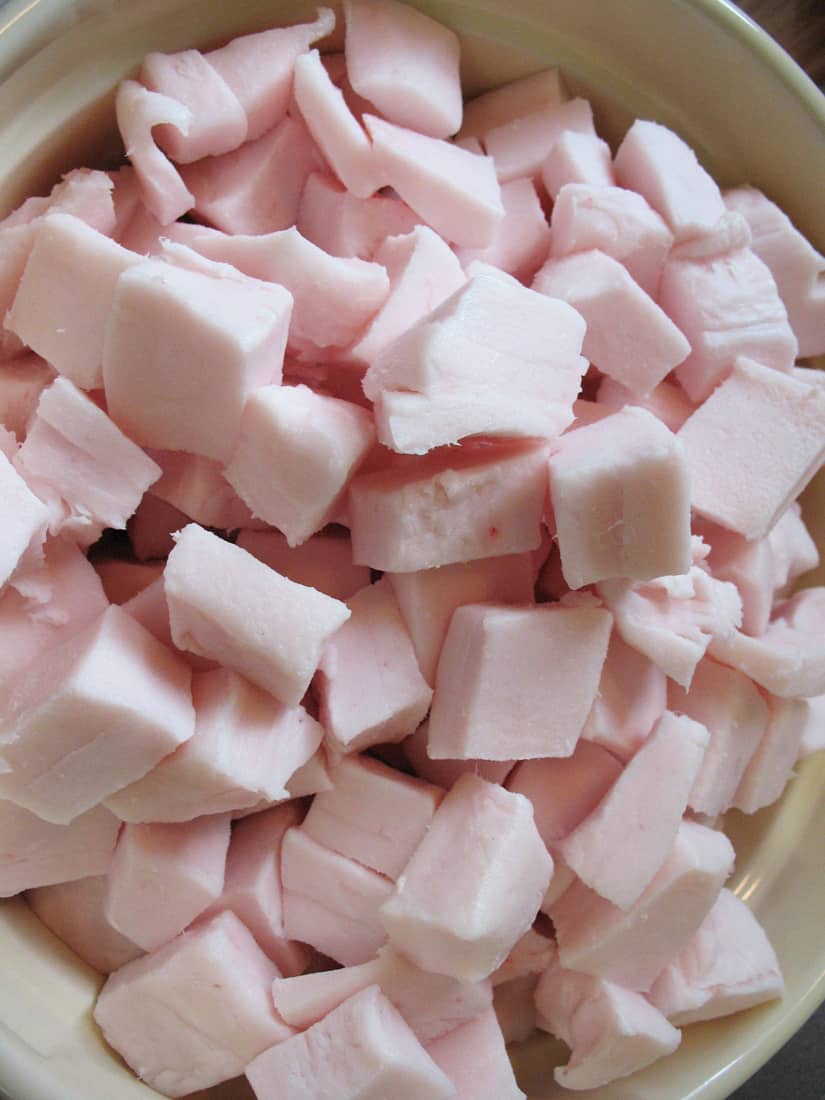
When buying fat, ask for pork back fat or leaf lard (which is fat from around the kidneys and is the most pure). You’ll especially want leaf lard if you want to use it to make pie crusts and other delicate foods like that. I used 5 lbs of pork back fat to get 4 pints of lard.
Here’s all you have to do to render your own lard:
1. Cut the fat up into little cubes (no larger than 1 inch or so). Or, you can also ask the butcher to grind it for you. That will save you time, and some people swear by this method.
2. Throw your cubes-o-fat into a crock pot and add about ¼ cup of water (to keep the fat from burning until it starts to melt). Turn the crock pot on low and let it do it’s magic. Essentially, rendering is just melting the fat by slow cooking it and allowing it to separate from any other residue that might be present in the fat itself.
Some say the smell is super strong and don’t like it. I didn’t mind it, however. It just smells like a pork roast cooking to me. Yum! But if the smell grosses you out, you can put the crock pot outside or in the garage or near an open window.
3. Check on it after about an hour or so. You’ll see some ‘cracklings’ forming—these are bits of residue that are being cooked in the tub full of fat. Some people like the cracklings best—and save them for things like salad toppings, etc. Check the crock pot every so often after the first hour. Once the cracklings sink to the bottom, your lard is done.
(Side note here: You really want to be careful not to overcook your fat or it will be more ‘piggy’ tasting and smelling (good lard won’t taste like pork and won’t smell like anything). If you end up with this kind of lard in the end (off-white or tan or brownish), don’t despair. You can still use it. Just don’t stick it in your baking.)
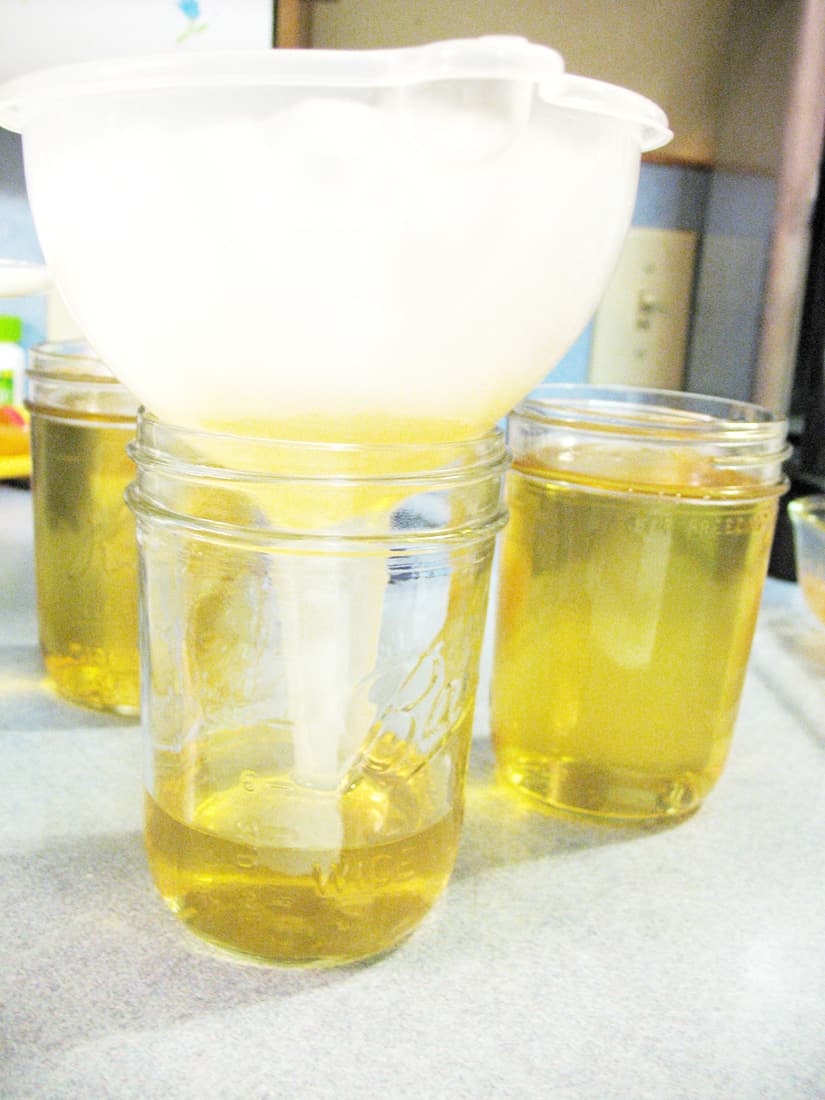
4. Next, you want some way of separating the lard from anything else that might be in there with it. I stuffed a coffee filter into a funnel and placed it on top of a pint-sized jar to drain. (You could also use a cheesecloth-lined colander but that just seemed like adding more dishes to me.) At this point, the liquid lard will be yellowish in appearance, but will turn white once it’s solid (and cooled).
5. Allow your jars of lard to cool on the counter and then keep them either in the fridge or freezer.
6. If you’d like to use the cracklings, stick them back in the crock pot by themselves and allow them to get crispy done.
There you have it. Now you, too, can render your own lard. And feel like a super hip pioneer. (Even though they didn’t have crock pots and they probably weren’t considered super hip at the time…)
PS Some friends and I just made a big batch of tamales using my homemade lard. I’m going to share the how-tos with you soon. I promise.